Thursday, 22 October 2015

Makeup Brushes Guide For Beginners


Ladies and Gents never underestimate the power of a makeup brush used the correct way.  Whether you are starting a career as a makeup artist, or  you just love to apply makeup on yourself, there are certain tools you need to begin. Below I have listed a simple guide for beginners..

Beginners Guide For Makeup Brushes

  1. Foundation: A synthetic brush. Can also be used for applying cream blush.
  2. Concealer: A narrow, synthetic brush with a slightly tapered edge.
  3. Powder: A big, soft natural-fiber brush.
  4. Contouring: A soft brush with a flat, angled edge. Also used for bronzing.
  5. Blush: A soft medium-full round brush. Natural fiber is best.
  6. Eye Shadow: A tapered, flat brush that is good for blending.
  7. Fan Brush: A light brush that is great for highlighter. It’s also good for brushing away loose eye shadow.
  8. Eyeliner: A narrow, angled brush for applying gel liner or shadow as liner.
  9. Eyelash and Brow Comb: The side with the small, plastic comb is used for removing mascara clumps from lashes. The bristled side is for grooming eyebrows.
  10. Eyebrow: A firm, angled brush used for filling in eyebrows with brow powder. Go for something with coarse bristles.
If your looking to start your brush collection out with higher end brushes view the video link below. I suggest that if your a beginner to start out with a lower end brushes, only because your are just starting out and it really doesn’t make sense to spend on higher end brushes.
http://youtu.be/5abo-_b9gYM

Wednesday, 21 October 2015

Tips to Achieve a Dewy Glow With Your Oily Skin


It seems like everywhere we turn, models and celebrities are showing off gorgeous, radiant skin that looks flawless and healthy all the time. How do they do it? Do these people not produce oils or something? If you have oily or combination skin, you understand the struggle of looking overly shiny pretty much 24/7. As much as you want to have that beautiful glow, it’s just not practical when you look like a greaseball within an hour of putting on your makeup. Dewy foundations? No, thanks. Highlighters? No way. All you’re probably thinking of is matte, matte, and more matte. But actually, with a few little tricks and a bit more maintenance, you can pull off that stunning, dewy finish in a flash. Check out our tips below to get that beautiful, just-back-from-the-beach, lit-from-within glow.
1. Mattifying primerFor all you oily skinned girls, the key to getting a gorgeous, dewy glow is to keep shine in check. In this case, a good mattifying primer is crucial. It might take a bit of experimenting to discover the perfect one, but once you find it, you’re as good as gold. Apply it to any areas where you tend to get shiny throughout the day. We recommend MAC’s Prep + Prime Skin Refined Zone for all-day oil contr
2. Apply a matte foundation mixed with a luminizer.The same principle of keeping oil in check applies here, as well. That’s why you’ll want to use a matte foundation, like the L’Oreal Infallible Pro Matte Foundation, as it keeps oil at bay. However, what you can do to be fresh faced and still stay shine free is mix in a bit of a liquid luminizer, such as Revlon’s PhotoReady Skinlights Face Illuminator, with the foundation. Keep in mind that anything that has a radiant finish will emphasize pores. So if that’s one of your issues, keep the dewiness concentrated on the outer portions of your face and mattify the center.
3. Apply foundation with a damp Beautyblender.If you want dewy skin, using a Beautyblender is the way to go. This egg shaped sponge has a pointed tip, perfect for getting into all the nooks and crannies of your face. But what makes it so unique is that you use it wet. Run it under the faucet for a few seconds and then ring it out until it’s damp. It will almost triple in size and have a light and fluffy texture. The damp sponge prevents foundation from looking cakey and heavy and adds moisture back into the skin, blending product out seamlessly and leaving a beautiful, radiant finish behind.
4. Cream bronzers and blushCream products are one of the easiest way to get a glowing finish to the skin. Apply a cream bronzer around the perimeter of the face and a cream blush to the apples of your cheeks before powdering. We love the e.l.f. Studio Contouring Blush & Bronzing Cream for a quick and easy 2-in-1 product. If you’re scared that creams will wear off during the day, keep reading until the end for another tip that will ensure they stay in place.
5. Powder in strategic areas.Once again, the key to achieving radiant skin is to not look overly shiny. Use a mattifying powder only in the areas where you get particularly oily–this is usually the center of the face. A neat trick is to apply the powder with the damp Beautyblender you just used for your foundation. The moisture in the sponge helps the product melt into the skin, eliminating that overly powdery look you can sometimes get. And ass always, keep blotting sheets and powder on hand for touch ups throughout the day.
6. Loads of highlighterPowder highlighters are perfect for all you oily skinned gals. Apply them only to the high points of the face–the tops of the cheekbones, cupid’s bow and a tiny bit on the bridge of the nose. This will attract light to the face in all the right areas, giving you that radiant finish. Again, avoid areas that are overly textured or have larger pores, as highlighters will emphasize them. Our holy grail highlighting powder isTheBalm’s Mary-Lou Manizer.
7. Setting SpraySetting sprays are your best friend, trust us. They lock in the makeup and basically do the work of a setting powder without that cakey finish. And those cream products you were worrying about coming off? Setting sprays will ensure they stay put. Spritz a generous amount all over your face and let it dry for makeup that wears extra-long throughout the day. We love the Urban Decay De-Slick Oil-Control Makeup Setting Spray for its ability to control oil and keep your skin looking great all day

Wednesday, 14 October 2015

How To Sustain Your Makeup On a Hot Sunny Day.

How To Sustain Your Makeup On a Hot Sunny Day.

The trick is to use Makeup Products That Will Not Melt Off On Hot Days.

1. Use Sweat proof Sunscreen e.g Bio balance sun protection cream with spf 50+, its water resistant.

2. Use a Mattifying primer; A good primer not only creates a smooth canvas for your makeup to glide on, it smoothes out fine lines & wrinkles + also increases the longevity/staying power of your makeup e.g Classic mattifing primer

3. Long-staying waterproof Foundation:  On hot days, you should pick up long-staying, water-proof foundation that is not too heavy yet they wouldn’t come down with the sweat e.g Mac waterproof foundation, Mac matchmaster foundation or Revlon colour stay foundation.


4. Use an Eyeshadow base/prime, waterproof mascara & a gel liner.

5. Concealer: you would still need a concealer to cover scars, flaws, pigmentation, blemishes, on a hot day. U should check out waterproof & long-staying concealers with intense pigmentation that can cover imperfections for a long stretch of time. e.g Mac pro longwear concealer or L.A Girl concealer.

6. Use Long-staying Eyeshadows & long lasting liquid lipsticks(Y)

7. use waterproof eyebrow definer or pencil.

8. Set your makeup with a translucent powder or an oil blotting powder

9. Makeup fixing mists: mists not only refresh your face on hot days, they would help you to set your makeup so that there is no makeup meltdown embarrassment in d heat & also such sprays increase d staying power of your makeup. e.g MAC Fix + Spray or Elf makeup mist, Urban Decay All Nighter Setting Spray.


Note: Oil blotting sheets are necessary for an oily skin with or without a sunny day.

Wednesday, 30 September 2015

Makeup Tips for Dark Skin


Hi Sweeties ,
Welcome to the end of September. So excited because  it's a special day for me. I hope you enjoyed all the holiday's fun, sure I did. It’s is a rainy day here…best way to get through it, is to grab a cup of tea, sit back, relax and read my blog ðŸ˜€ . Okay, today, I’m sharing makeup tips for dark skin women. I hope you enjoy reading ðŸ˜‰ .

Dark skinned women usually have plump lips, nicely toned skin and piercing eyes so there’s a million ways to go to flaunt it all. Besides, makeup is playing, it’s self-expression, it’s fun – use intense colors, make bold choices, make it your own in every way!

Foundation

Because, for dark skinned women, getting an even skin tone is an absolute imperative, buying an adequate foundation may be the most important thing. Find the one that looks natural, even if it means mixing a few different foundations. Makeup artists recommend using a shade ever so slightly lighter than your own skin tone.
Try your best to apply it evenly. You may want to use a brush or a cosmetic sponge, for extra control, although many girls find it easiest to use their fingers to get it everywhere evenly and blend it out nicely. As the name itself says it’s simply – foundation – it should be very light and not feel like you have a ton of it on your face.

Celeb Buzz on Foundation:  New mom Beyoncé has NARS Sheer Mate Foundation in color New Orleans to thank for her flawless complexion. Might be a bit pricey but its fab!

Powder


Dark skinned girls usually have a problem with oily skin. Yes, it’s a huge bummer, but – there are a lot of products that can solve, or, at least, lessen this problem! When in need of a quick fix, try using some good old powder. It will give your skin an instant, fresh look. Be sure to pick a translucent powder without any yellowish, or any other similar remnants. Take time to choose, in some cases a quality powder can even replace foundation.

Celeb Buzz on Powder: You know what brand of powder Nicki Minaj likes the most? Well, it’s M.A.C. Select Sheer Pressed Powder in NC40! And also, Nicki’s no stranger to oily skin problems, but you wouldn’t be able to tell would you?

Blush

It might seem exaggerated but dark skinned women can really benefit from using blush. Since in fair skinned women blush is so frequent, it usually seems kind of casual. When a dark skinned woman uses blush it automatically reads as elegant and stylish. Colors that work best are darker shades of red and orange.

The way you apply your blush determents what’s accentuated on your face. Example: if you have high cheek bones put blush right on top of them, if you have fluffy cheeks and a rounder face shape suck in your cheeks and apply blush right in between your cheek line and your jaw line.

Celeb Buzz on Blush: Hot Latina J Lo likes using M.A.C. Powder Blush in Tenderling. To make it look like this girl does smile to find the apples of your cheeks and apply your blush to them, then, blend it softly up to the hairline for a natural flush.


Although contrasting colors can be fun, using an extra light color of lipstick on your lips is a total no – no for dark skinned women. You will not look chic, more likely, you will look sick. Try to minimize the contrast by choosing colors like deep purple, wine, brown and, of course, the classic – red. No matter the color, transparent lip gloss will intensify the look and add sensibility to your lips.
Celeb Buzz on Lipstick: Until just recently Rihanna stirred up the scene with her fiery red hair and often – a nice red lipstick shade to match. Rihanna has an olive skin tone so she can pull it off like no one can! If you want to knowwhat her favorite brand is, its – yeah you guessed it – CoverGirl!

Eyes

Flaunt your eyes! If, in other cases, contrast was seen as slightly risky, but this is where it starts to get interesting. Your dark skin is actually a playground for different eye shadows. While on fair skin bold mixes can seem like too much, you have the luxury to experiment with deep colors.
You can easily pull off the bronze look with some shimmering eye shadow and colors like pumpkin, gold, or pink that will look great against your complexion. Make sure to use shiny eyeliner, maybe silver, which will look great and accentuate your lovely eyes. Also, black eye shadow and the smoky eyes look will look absolutely enticing on dark skin and eyes!
Celeb Buzz on Eye Shadow: Speaking off smoky eyes, Armenian beauty Kim K sure knows how to rock this look doesn’t she? There are lots of YouTube tutorials showing you how you can pull it off too, don’t be afraid to experiment!

Wednesday, 23 September 2015

How to Make Foundation Stay Longer


Note: foundation & concealer are makeup must-have to mask flaws, even out skin tone, & fake a good night's sleep, it's a huge disappointment when they seem to slide right off your face halfway through the day!

Therefore, in order to prevent any disappointment, Preparing skin/face for makeup application should come first, as the true foundation of any great makeup look is good skin care. How you take care of your skin & prep it for makeup has a big impact on how your makeup applies, looks,& wears. Here are face care basics to keep in mind:

• Use a gentle cleanser appropriate for your skin type to remove excess oil & impurities that can interfere with the performance of foundation & concealer.

• Exfoliate to make skin smoother. Whether you choose an AHA or BHA exfoliant or use a scrub, getting rid of dead cells & flakiness can do wonders for making foundation apply & look better.

• Moisturize. All skin needs a mix of d skin-repairing, cell-communicating, & antioxidant ingredients that are found in the best moisturizers. It's simply a matter of finding the right moisturizer for your skin type.

• Dry skin does best with creams; combination skin may need a cream and lotion; oily skin does best with a liquid or gel moisturizer; and those with normal skin can choose based on personal preference.

• Foundation primer. Possibly, but most often this is an optional step, & likely unnecessary if ur other skin care products are doing d job already. The idea behind primer is to create a surface that makes it easier for foundation & concealer to glide across & adhere to, so application is easier. A good moisturizer or serum can do the same function.

Most importantly,& we can't stress this enough, if your foundation doesn't contain sunscreen with SPF 25/greater (& greater is better), then you need to apply a daytime moisturizer with sunscreen after primer. It also doesn't hurt to apply a sunscreen, a moisturizer with sunscreen, a foundation with sunscreen, and a pressed powder with sunscreen! Now that's great daytime protection, especially in sunny climates.


       APPLICATION TECHNIQUES AND SETTING MAKEUP

How you put on your makeup is just as important as what makeup you use. Proper techniques will ensure your foundation & concealer perform at their absolute best.

The first & most important things you need to know are that less is more & you need to blend, blend, & blend again. Start applying foundation in the center of the face, then blend it out toward the edges with beauty blender, being careful to avoid ur hair, but getting it close enough to not leave a visible edge there. Also watch out for your jawline,too! Start application from the middle of d face & work your way out,  to avoid these problems, creating a more natural and flawless look.

Beauty blenders/Sponges ensure smoother application, & can be used to dab away excess foundation. The idea is to get even coverage that appears as natural as possible, which means trying to get your makeup to match with your skin.

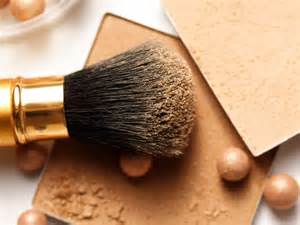
When it comes to concealer, application is fairly straightforward. With your fingers, or a brush, gently dot concealer on d areas u want to cover. Pat the concealer in place, making sure not to drag it over skin.

As with foundation, start out with a light amount, then build to get the coverage you want. Pat the concealer in one direction, repeating this step until it sets. Don't use a back-and-forth or rubbing motion, as this basically just wipes concealer away as soon as you apply it, leaving you with spotty to no coverage.

Afterwards then powder application. It's just a simple truth that both foundation & concealer last much longer if you set them with some sort of powder & we promise there are powders out there that won't make your skin look dry or overly made-up.

Some people choose translucent powders, while others prefer highlighting powders, and some prefer loose powder, while others like pressed powder. No matter the type, your makeup will last longer with powder over it. We don't mean a thick layer of powder (which can emphasize fine lines and dry spots on the face); just a soft dusting brushed on areas where foundation and concealer have been applied, and you can brush on a bit more over shine-prone areas.

Extra effort to keep makeup on for the day.

OK, so you have chosen the right foundation & concealer for your skin type, applied them the correct way, & set them with powder. Are there any extra steps to make sure your hard work lasts the day?

Yes!!!

Most important, even though it sounds incredibly basic, is to mak sure u don't touch your face. People actually touch their faces hundreds of times during the day, & each touch takes off some makeup.

Guilty?

Given how often we touch our faces, it's no wonder makeup doesn't stay put! Try your best to be conscious of where your hands go, and avoid rubbing your eyes, scratching your chin, brushing your cheek, or doing anything else that could disturb your makeup, such as resting the phone against your chin.

I hope this post as been helpful to someone today!!!

Friday, 21 August 2015

Concealer : Tips for a flawless face.


Spot the difference in both under eye area 

When you wish to wear no makeup like in the image above, but want a flawless, fresh,  bright and gorgeous look on. Apply a minimal amount of concealer that is closer to your skin tone Or rather a lighter shade of foundation and apply it under the eye area. This would make a world of difference in transforming your look from dull to rested and flawless, but not made up. Again, the trick is to blend extremely well so that there is no discernible edge under the eye areas.

Good luck beginners.
Please let me know if you tried it and your results. 

Thanks.

Wednesday, 19 August 2015

How To Apply Concealer


WHAT'S A CONCEALER?

 What purpose does it serve?
Treating this because of the abused use of this particular product.
This beauty product can do wonders for your face.It's primary purpose is to offset the natural shadows that occur under the eyes and in more elaborate makeup applications, to highlight certain areas of the face such as the centre of the nose, forehead, top of the cheekbones, or center of the chin.

Concealer Application:


The under-eye area needs concealer most because the eye is set back in its socket, which lies in a shadow created by the bone structure. The skin around the eye also tends to be thinner than the skin on the rest of the face, so pigment discolouration & surface veins show through easily, making the under-eye area dark & dull.
If you don't have dark circles under the eye area, you don't need a concealer. If your foundation is opaque enough to even out the skin tone under the eyes, you don't need an extra product for that area.
More so when you shop for an effective concealer, its critical that the concealer be the same basic, natural skin tone as your foundation, only half shade lighter, that way you can be assured that the foundation & concealer will blend well together  under the eye. If you choose a concealer that is way lighter than your foundation, you will simply end up with a third colour where they overlap & inter sect.
The only time you would use a lighter concealer is when the area under the eye is naturally lighter or the same colour as the rest of the face. In that case, it's fine to apply your foundation with no concealer.

Therefore apply the concealer first & then d foundation. If you are using matte foundation, blend the concealer first to prevent stains under the eyes (It's hard to blend anything over matte foundations).


As illustration above, you can also extend the application of the concealer in the small arc at the inner corner of d eyes or for a more involved makeup application, you can apply concealer in a sweep motion under d entire eye & out on d upper cheekbone